
Recovering from standing water requires a systematic, room-by-room approach. Begin with safety precautions, shutting off utilities and wearing protective gear. Remove water using pumps, wet vacuums, or manual methods. Focus on thorough drying with fans and dehumidifiers. In basements, address structural issues and install preventive measures. For living areas, extract wet items and disinfect surfaces. Kitchens and bathrooms need special attention to appliances and plumbing fixtures. Bedrooms require careful salvage of personal belongings. Throughout the process, document damage for insurance purposes and consider professional help for extensive flooding. This guide provides a comprehensive roadmap for restoring your home after water damage.
Initial Assessment and Safety Precautions
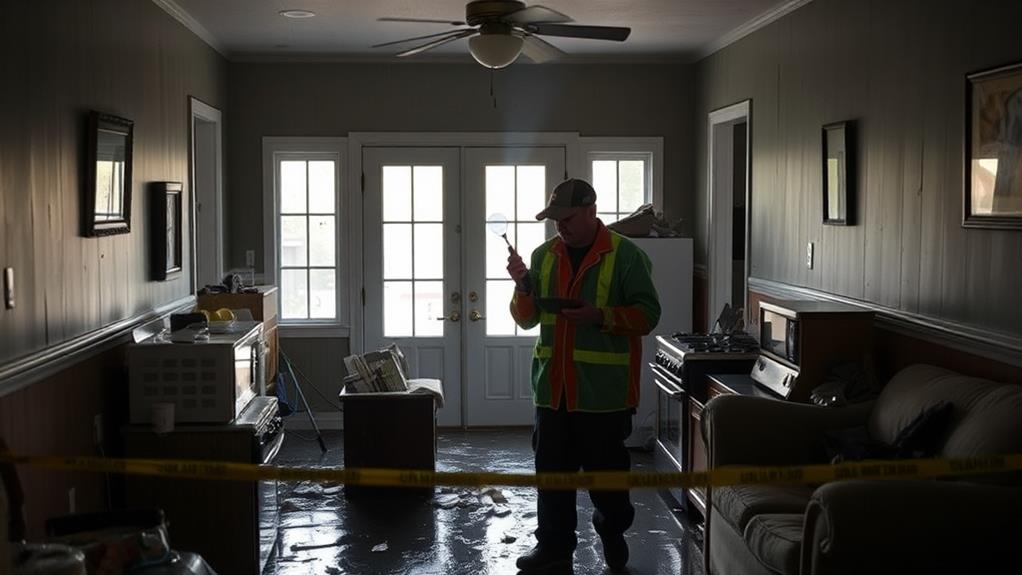
Safety first: When faced with standing water in your home or property, conducting an initial assessment and taking proper safety precautions are crucial steps. Before entering the affected area, ensure that all electricity and gas supplies are shut off to prevent electrocution or gas leaks. Wear protective gear, including waterproof boots, gloves, and a face mask to guard against contaminants and potential health hazards.
Assess the extent of the water damage by carefully inspecting each room, noting the water level, affected materials, and any structural concerns. Look for signs of mold growth, which can start within 24-48 hours of water exposure. Document the damage with photographs and videos for insurance purposes.
Be aware of potential hazards such as slippery surfaces, submerged objects, or weakened structures. If the water level is above ankle-height or if you suspect contamination from sewage or chemicals, it's best to contact professional water damage restoration services. They have the expertise and equipment to safely remove standing water and begin the drying process. Remember, swift action is essential to minimize damage and prevent long-term issues like mold growth and structural deterioration.
Water Removal Techniques
Once the initial assessment is complete and safety measures are in place, the focus shifts to removing the standing water. The most effective method depends on the water depth and the available equipment.
For shallow water (less than 2 inches), push brooms and squeegees can be used to direct water towards drains or exits. Mops and towels are useful for soaking up residual moisture.
For deeper water, submersible pumps are the most efficient solution. These can be rented from hardware stores and quickly remove large volumes of water. Wet/dry vacuums are effective for moderate amounts of water and can reach tight spaces. In the absence of power, manual bilge pumps or bucket brigades may be necessary.
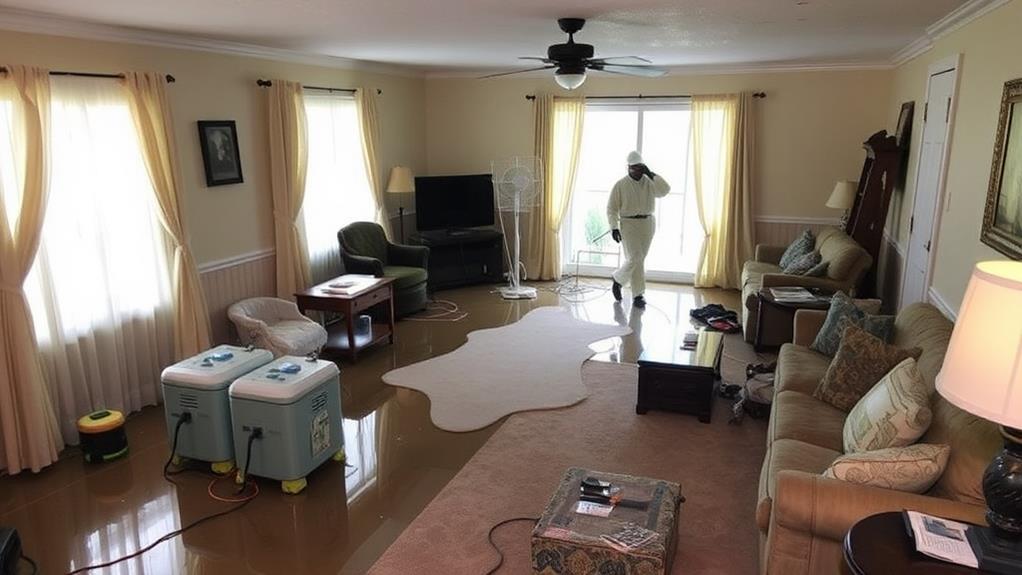
After bulk water removal, dehumidifiers and fans should be deployed to accelerate drying. Open windows and doors to improve air circulation, weather permitting. Pay special attention to hidden areas like crawl spaces, wall cavities, and under flooring, as trapped moisture can lead to mold growth. Professional water extraction services may be necessary for extensive flooding or when dealing with contaminated water, ensuring thorough and safe removal.
Drying and Dehumidification Process

The battle against moisture continues even after standing water has been removed. Proper drying and dehumidification are crucial to prevent further damage and mold growth. Begin by opening windows and doors to promote air circulation, if weather permits.
Use high-velocity fans to move air across wet surfaces, focusing on walls, floors, and hidden areas like closets and cabinets.
Deploy industrial-grade dehumidifiers to extract moisture from the air and materials. Position them strategically throughout the affected areas, ensuring maximum coverage. Monitor humidity levels regularly, aiming for a relative humidity below 50%. As the drying process progresses, periodically reposition fans and dehumidifiers to target stubborn damp spots.
For carpets and upholstery, use specialized drying equipment like air movers and floor drying systems. Remove baseboards and drill small holes in drywall to facilitate airflow within wall cavities. Inspect and dry insulation if necessary. Throughout the process, continually assess moisture levels using moisture meters on various surfaces and materials. This helps identify areas requiring additional attention and determines when the drying process is complete, typically taking 3-5 days depending on severity.
Basement Restoration Strategies
Resilience is key when tackling basement restoration after standing water damage. The process requires a systematic approach to ensure thorough rehabilitation.
Begin by removing all salvageable items and discarding those beyond repair. Next, address any structural issues, such as cracks in the foundation or compromised walls, to prevent future water intrusion.
Install a sump pump system if not already present, and consider adding a battery backup to safeguard against power outages. Apply waterproof sealants to walls and floors to create a moisture barrier. Replace damaged drywall with water-resistant materials, and opt for inorganic insulation to prevent mold growth.
Implement proper ventilation systems, including dehumidifiers and exhaust fans, to maintain optimal humidity levels. Choose water-resistant flooring options like epoxy, tile, or treated concrete. Elevate appliances and electrical systems to protect against future flooding. Finally, organize storage solutions that keep items off the floor and allow for proper air circulation.
Regular maintenance and inspections are crucial to prevent future water damage and ensure the longevity of your restored basement.
Living Room Recovery Steps
After the floodwaters recede, restoring your living room requires a systematic approach to minimize damage and ensure a safe, habitable space. Begin by removing all standing water using pumps or wet vacuums.
Once the water is gone, remove all wet items, including furniture, rugs, and decorations. These items should be dried separately or discarded if severely damaged.
Next, focus on drying the room itself. Use fans, dehumidifiers, and open windows to promote air circulation. Remove wet drywall and insulation up to at least 12 inches above the water line to prevent mold growth. Clean and disinfect all surfaces with a bleach solution or appropriate antimicrobial cleaner.
Inspect electrical outlets, wiring, and appliances for water damage. Have a licensed electrician assess the safety of your electrical system before use. Check for structural damage to floors, walls, and ceilings. Address any warping or weakening immediately to prevent further issues.
Once the room is thoroughly dried and cleaned, begin the restoration process. Replace damaged drywall, repaint walls, and reinstall flooring as necessary. Only return items to the living room once you're certain the space is completely dry and free from potential mold growth.
Kitchen and Appliance Restoration
Restoring a kitchen after standing water damage requires careful attention to both structure and appliances. Begin by removing all standing water and thoroughly drying the area using dehumidifiers and fans. Inspect and remove any damaged flooring, cabinets, and drywall. Sanitize all surfaces with a bleach solution to prevent mold growth.
For appliances, disconnect them from power sources before assessment. Refrigerators and freezers may be salvageable if the water didn't reach the motor. Clean and disinfect their interiors, and have a professional inspect the electrical components before reconnecting. Dishwashers and washing machines often suffer extensive damage from standing water and may need replacement. For smaller appliances like microwaves and toasters, consult with a repair specialist to determine if restoration is possible or cost-effective.
Pay special attention to electrical outlets, switches, and wiring. Have a licensed electrician inspect and replace any compromised components. Lastly, address countertops and backsplashes. If made of porous materials like wood or laminate, they may need replacement. Solid surface or stone countertops can often be cleaned and disinfected. Throughout the restoration process, document all damage and repairs for insurance purposes.
Bathroom Rehabilitation Methods

Moving from the kitchen to another critical area of the home, bathroom rehabilitation after standing water damage requires a systematic approach. Begin by removing all standing water and thoroughly drying the space using dehumidifiers and fans.
Inspect and remove any water-damaged materials, including drywall, insulation, and flooring. Pay special attention to the subfloor, as it may need replacement to prevent future mold growth and structural issues.
Sanitize all surfaces with a bleach solution or specialized antimicrobial products to eliminate bacteria and prevent mold growth. Focus on porous materials like grout and caulk, which may need replacement if extensively damaged. Assess plumbing fixtures, including toilets, sinks, and showers, for potential water damage or contamination. Replace damaged fixtures and ensure proper functionality of all plumbing systems.
Evaluate cabinets and vanities for water damage, replacing or restoring as necessary. Inspect electrical components, such as outlets and light fixtures, for water exposure and replace if compromised. Finally, repaint walls and ceilings with mold-resistant paint and install new, water-resistant flooring to complete the bathroom rehabilitation process. Throughout the restoration, prioritize safety and consider consulting professionals for complex repairs or extensive damage.
Bedroom and Closet Salvage
Salvaging bedrooms and closets after standing water damage presents unique challenges due to the presence of porous materials and personal belongings. Begin by removing all wet items, including bedding, clothing, and furniture. Sort salvageable items from those that must be discarded, paying special attention to electronics and valuable documents.
For mattresses and upholstered furniture, consult a professional restoration service, as these items often cannot be effectively cleaned and dried at home. Wooden furniture may be salvaged if dried quickly and properly treated for mold prevention. Remove wet carpeting and padding immediately to prevent further damage to the subfloor.
In closets, remove all clothing and accessories. Machine-washable items should be cleaned promptly, while dry-clean-only garments require professional attention. Leather items need specialized care to prevent warping and mold growth.
Thoroughly clean and disinfect all surfaces, including walls, floors, and shelving. Use dehumidifiers and fans to expedite drying. Monitor humidity levels closely to prevent mold growth. Replace damaged drywall, insulation, and flooring as necessary. Finally, address any lingering odors with appropriate treatments to ensure a safe and comfortable living environment.
Structural Repairs and Reinforcement

After addressing immediate water damage concerns, attention must shift to the critical task of structural repairs and reinforcement. Standing water can severely compromise a building's structural integrity, necessitating thorough inspection and targeted interventions. Begin by assessing load-bearing walls, floor joists, and support beams for signs of water damage, warping, or deterioration.
Engage a professional structural engineer to evaluate the extent of damage and recommend appropriate repairs. Common interventions include reinforcing weakened floor joists with sister joists, replacing damaged wall studs, and installing additional support beams where necessary. Pay close attention to the foundation, as standing water can cause settling or shifting. Address any cracks or unevenness promptly to prevent further structural issues.
Ensure all repairs comply with local building codes and use water-resistant materials where appropriate. Consider implementing preventative measures such as improved drainage systems or waterproofing techniques to mitigate future water damage risks. Finally, allow ample time for structural elements to dry completely before proceeding with finish work, as trapped moisture can lead to ongoing problems and compromise the effectiveness of repairs.
Preventing Future Water Damage
With structural repairs completed, the focus shifts to implementing strategies that prevent future water damage incidents. Begin by addressing the root cause of the initial flooding, whether it was faulty plumbing, inadequate drainage, or external factors. Install backflow prevention devices on sewer and septic tank connections to prevent sewage backups. Ensure proper grading around the home's foundation, sloping away from the structure to direct water runoff.
Regularly clean and maintain gutters and downspouts, extending downspouts at least 5 feet from the foundation. Consider installing a sump pump system in basements or crawl spaces prone to water accumulation. Apply waterproof sealants to foundation walls and floors in vulnerable areas.
Upgrade to water-resistant building materials in high-risk zones, such as cement board for bathroom floors or moisture-resistant drywall. Implement a routine maintenance schedule for plumbing systems, checking for leaks and worn components. Install water detection devices near potential problem areas like water heaters, washing machines, and under sinks. These sensors can provide early warning of leaks before significant damage occurs.
Frequently Asked Questions
How Long Does the Entire Water Damage Restoration Process Typically Take?
The duration of water damage restoration varies depending on the extent of damage and affected areas. Typically, the process can take anywhere from 3 to 5 days for minor issues, up to several weeks for severe cases requiring extensive repairs.
Can I Stay in My Home During the Restoration Process?
Like a ship in stormy seas, your safety during restoration is paramount. Typically, it's advisable to vacate your home during the process. Extensive work, noise, and potential health hazards make temporary relocation the wisest course of action for most homeowners.
Will My Homeowner's Insurance Cover the Cost of Water Damage Restoration?
Coverage for water damage restoration depends on your specific homeowner's insurance policy. Many policies cover sudden and accidental water damage, but excluded scenarios exist. Review your policy details or consult your insurance agent for accurate information.
Are There Any Health Risks Associated With Standing Water in Homes?
According to the CDC, 50% of flood-related deaths occur from waterborne illnesses. Standing water in homes poses significant health risks, including bacterial and mold growth, contamination from sewage, and potential exposure to harmful pathogens and chemical pollutants.
How Can I Identify and Prevent Mold Growth After Water Damage?
To identify and prevent mold growth after water damage, promptly dry affected areas within 24-48 hours. Inspect for discoloration, musty odors, and visible growth. Use dehumidifiers, increase ventilation, and clean surfaces with appropriate antimicrobial solutions to inhibit mold development.
Conclusion
Restoring a home after standing water damage requires meticulous effort and expertise. While the process is daunting, it is not insurmountable. Room-by-room strategies offer hope amidst devastation. The journey from waterlogged chaos to dry stability is arduous yet rewarding. By following systematic procedures and employing professional techniques, homeowners can reclaim their living spaces. Vigilance in prevention, coupled with swift action during crises, ensures resilience against future water-related calamities. The path to recovery, though challenging, leads to renewed comfort and security.