
DIY solar projects are a great way to start harnessing renewable energy at home. You can begin with simple projects like a solar-powered phone charger or garden lights, which require minimal components and basic skills. For more ambitious beginners, consider building a solar oven for outdoor cooking or a portable solar generator. These projects typically involve solar panels, batteries, and simple circuitry. As you gain confidence, you might tackle larger installations like a solar water heater. Each project offers hands-on experience with solar technology while potentially reducing your energy costs. The possibilities are endless when you tap into the power of the sun.
Solar-Powered Phone Charger
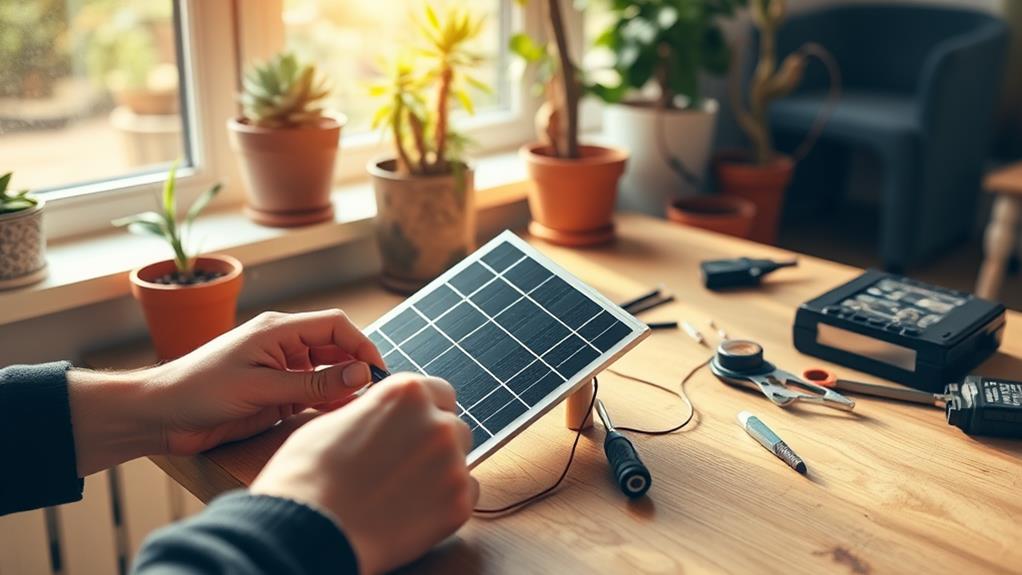
Many beginners find a solar-powered phone charger to be an ideal entry-level DIY project. It's relatively simple to build and offers immediate practical benefits. To create your own, you'll need a small solar panel, a USB charging module, a lithium battery, and a case to house the components.
Start by connecting the solar panel to the charging module, which regulates the voltage. Next, attach the lithium battery to store the energy collected. Finally, connect a USB port to the charging module, allowing you to plug in your phone or other devices.
When assembling your charger, ensure all connections are secure and properly insulated. You can use a plastic or wooden box as a casing, making sure to leave the solar panel exposed. For added convenience, consider including an LED indicator to show charging status.
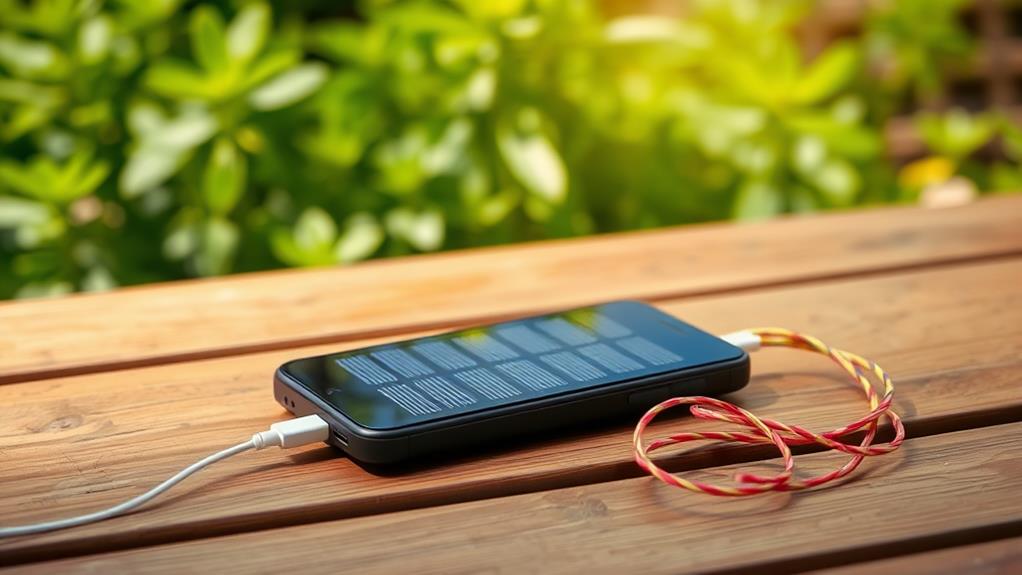
Once complete, place your charger in direct sunlight to charge the internal battery. You'll then have a portable power source for your phone, ready to use anytime. This project not only saves you money but also reduces your reliance on grid electricity, making it an eco-friendly solution for keeping your devices powered up.
DIY Solar Garden Lights
Three simple components form the core of DIY solar garden lights: solar panels, rechargeable batteries, and LED bulbs. You'll need to connect these elements correctly to create functional and attractive outdoor lighting.
Start by selecting small solar panels, typically 2V to 6V, which can efficiently charge AA or AAA rechargeable batteries during daylight hours. Choose LED bulbs that match your battery voltage for optimal performance.
To assemble your solar garden lights, you'll need to wire the solar panel to the battery through a diode, which prevents reverse current flow at night. Connect the LED to the battery via a switch, allowing you to control when the light turns on. Waterproof your circuitry using silicone sealant or placing it in a weather-resistant enclosure.
For the light fixtures, get creative with mason jars, recycled bottles, or purpose-built lamp housings. Mount your solar panels on top where they'll receive maximum sunlight. Position your DIY solar garden lights along pathways, near plants, or as accent lighting for outdoor features. With proper placement and maintenance, these eco-friendly lights will illuminate your garden for years to come.
Solar Water Heater
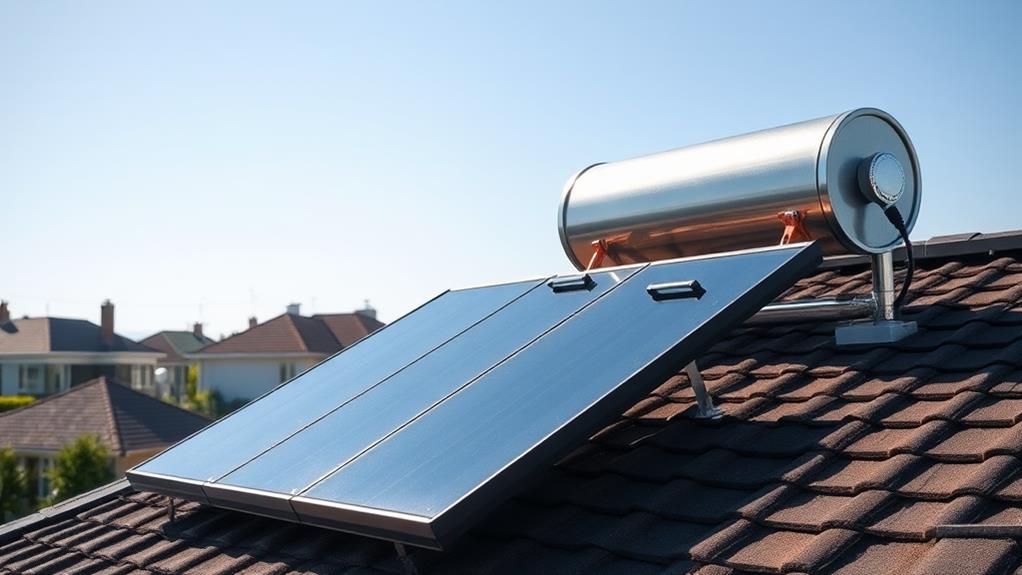
For a more substantial DIY solar project, consider building a solar water heater. This eco-friendly system can significantly reduce your energy bills and carbon footprint. You'll need a solar collector, storage tank, pump, and connecting pipes. The collector, typically a flat panel or evacuated tubes, absorbs sunlight to heat water or a heat-transfer fluid.
Start by choosing a suitable location for your collector, ideally facing south with unobstructed sunlight. Mount the collector securely on your roof or a sturdy frame.
Connect the collector to your storage tank using insulated pipes. Install a pump to circulate water or the heat-transfer fluid between the collector and tank. If you're using a heat-transfer fluid, you'll also need a heat exchanger in the tank.
Ensure proper insulation of all components to maximize efficiency. Add temperature sensors and a controller to regulate the system. Don't forget to include safety features like pressure relief valves. While building a solar water heater requires some plumbing and electrical skills, it's a rewarding project that can provide hot water for years to come.
Portable Solar Generator
A portable solar generator is an excellent DIY project for those seeking a reliable off-grid power solution. You'll need a few key components to build one: solar panels, a charge controller, batteries, an inverter, and a sturdy container.
Start by selecting solar panels that match your power needs, typically ranging from 50 to 200 watts. Connect these to a charge controller, which regulates the voltage and current flowing to your batteries.
Choose deep-cycle batteries, such as AGM or lithium-ion, for their ability to withstand repeated charging cycles. The inverter converts the DC power from your batteries into AC power for your devices. Select an inverter that can handle the maximum load you'll need.
Assemble these components in a weather-resistant container, ensuring proper ventilation for heat dissipation. Wire everything together, following safety guidelines and using appropriate gauge wires. Include outlets, USB ports, and a voltmeter for monitoring battery levels.
Test your system thoroughly before use. With your DIY portable solar generator, you'll have a versatile power source for camping trips, emergencies, or reducing your reliance on the grid.
Solar Oven for Outdoor Cooking
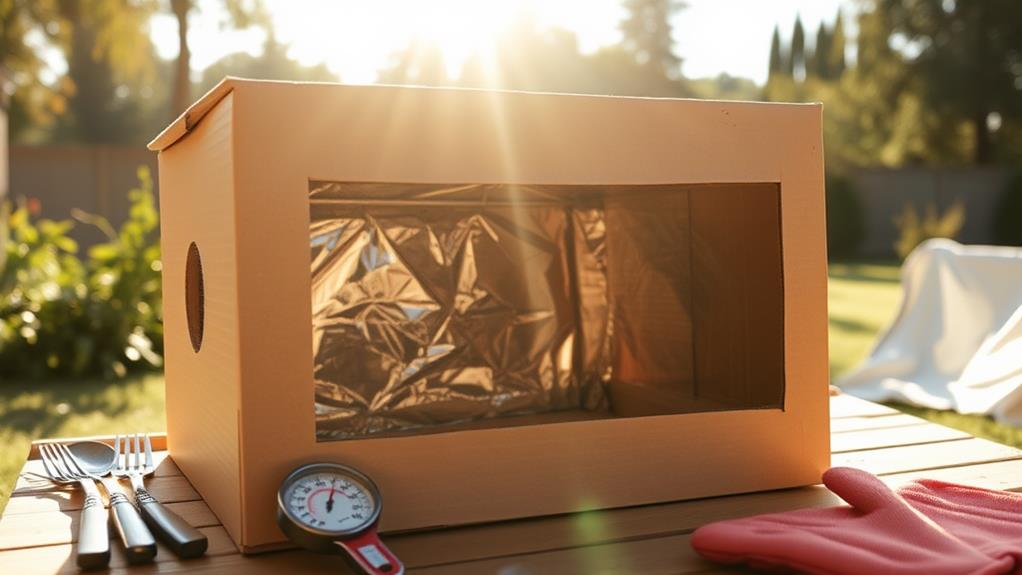
Moving from powering devices to cooking with the sun, let's explore another exciting DIY solar project. A solar oven harnesses the sun's energy to cook food without electricity or fuel. You can build one using simple materials like cardboard, aluminum foil, and a clear plastic bag.
To create your solar oven, start with a cardboard box and line its interior with reflective material. Cut a flap in the box's lid and cover it with clear plastic to trap heat. Position the flap to direct sunlight into the box. Place a dark-colored pot or pan inside to absorb heat efficiently.
Your solar oven can reach temperatures between 200°F and 300°F, perfect for slow-cooking meals or baking. It's ideal for camping trips, emergency preparedness, or eco-friendly outdoor cooking. You can prepare dishes like rice, stews, and even baked goods.
Remember to angle your oven towards the sun and adjust its position throughout the day for optimal performance. Cooking times will vary based on sunlight intensity and food type. With practice, you'll master the art of solar cooking and enjoy delicious, sustainable meals outdoors.
Conclusion
You've now got some great DIY solar projects to try! These beginner-friendly ideas will help you harness the sun's power and reduce your carbon footprint. Did you know that a single solar panel can prevent 300 pounds of carbon emissions annually? That's equivalent to planting 10 trees! As you dive into these projects, you'll not only save money but also contribute to a cleaner environment. So grab your tools and let the sun fuel your creativity!