Transform your kitchen affordably with budget-friendly DIY backsplash ideas. Peel-and-stick tiles offer a wide range of styles and easy installation. Create custom designs using paint and stencils for a personalized touch. Repurpose materials like reclaimed wood or salvaged tiles for a unique look. Textured wallpaper and temporary contact paper provide quick solutions with minimal effort. Craft mosaics using affordable materials or experiment with faux tile techniques for a high-end appearance. These creative options allow you to refresh your space without breaking the bank. Explore these ideas to discover the perfect backsplash solution for your kitchen makeover.
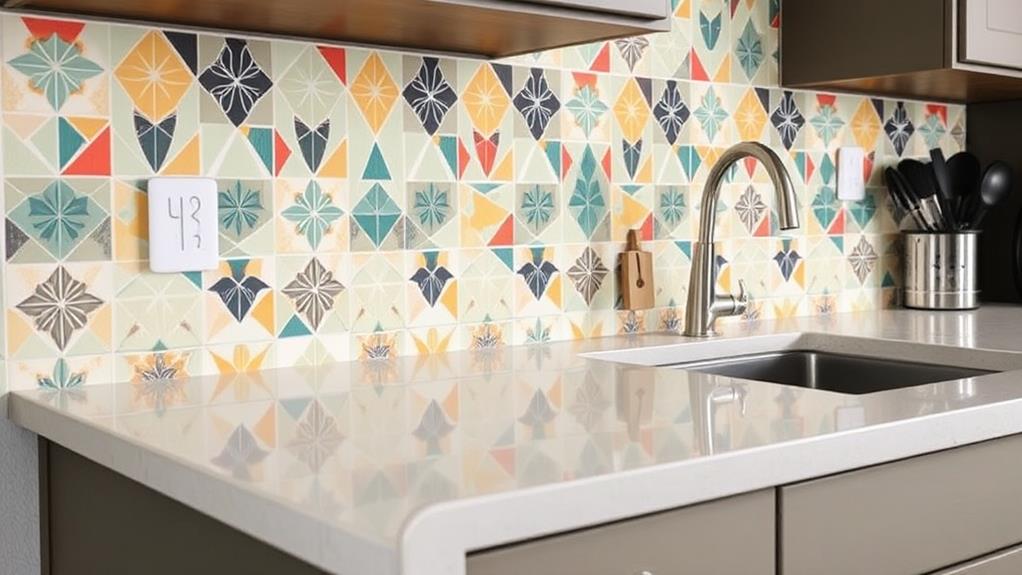
Peel-and-Stick Tile Magic
For those seeking a quick and hassle-free backsplash solution, peel-and-stick tiles offer an attractive option. These versatile tiles come in a wide range of styles, colors, and patterns, allowing homeowners to achieve a custom look without the need for professional installation. Made from durable materials like vinyl or gel-based substances, peel-and-stick tiles are designed to withstand moisture and heat, making them ideal for kitchen and bathroom applications.
The installation process is straightforward: clean the surface, measure and cut tiles if necessary, peel off the backing, and press firmly into place. Many brands offer grout-like lines between tiles for a more authentic appearance. While not as long-lasting as traditional tile, peel-and-stick options can last several years with proper care and maintenance.
One of the main advantages of peel-and-stick tiles is their affordability. They typically cost less than traditional tile options and eliminate the need for specialized tools or professional labor. Additionally, these tiles can be easily removed or replaced, making them an excellent choice for renters or homeowners who like to change their decor frequently. With proper installation and care, peel-and-stick tiles can provide a budget-friendly, attractive backsplash solution for any home.
Painted Patterns and Stencils
While peel-and-stick tiles offer a quick solution, painted patterns and stencils provide a more personalized and artistic approach to backsplash design. This method allows homeowners to create unique, customized designs that perfectly match their kitchen's aesthetic. With a wide range of stencil patterns available or the option to create your own, the possibilities are virtually limitless.
To begin, prepare the wall surface by cleaning and priming it. Choose high-quality, moisture-resistant paint suitable for kitchen environments. For a simple yet effective design, use painter's tape to create geometric patterns or stripes. For more intricate designs, invest in durable stencils and apply them using a foam roller or stencil brush.
Consider using multiple colors or incorporating metallic accents for added depth and visual interest. Seal the painted design with a clear, water-resistant topcoat to ensure longevity and easy cleaning. This DIY method not only saves money but also allows for easy updates in the future, as repainting is simpler and more cost-effective than replacing tiles. With patience and creativity, painted patterns and stencils can transform a plain backsplash into a stunning focal point of your kitchen.
Repurposed Materials as Backsplash
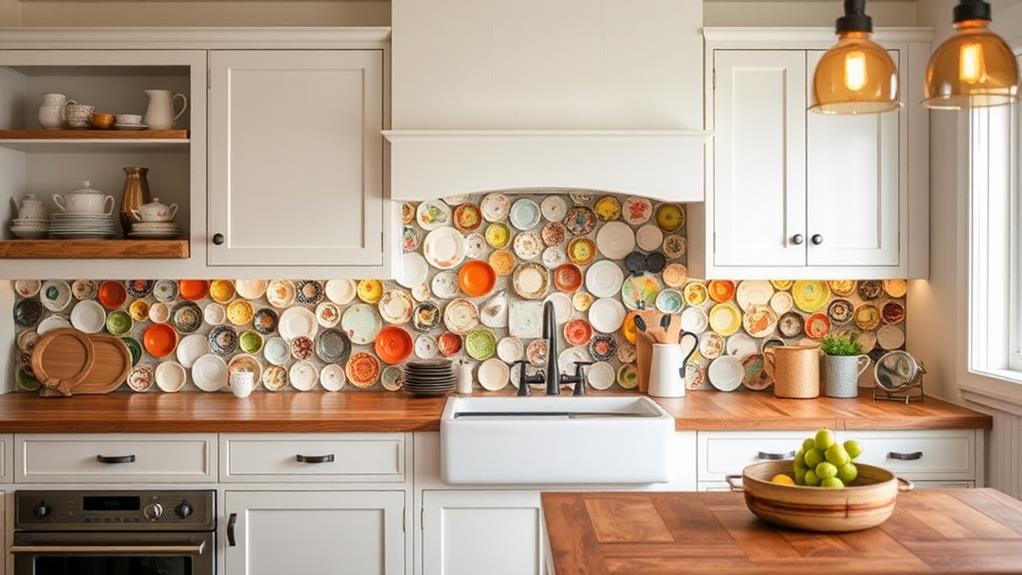
Upcycling everyday materials into a unique backsplash not only adds character to your kitchen but also promotes sustainability. Repurposed materials offer an eco-friendly and budget-conscious alternative to traditional tile options.
Consider using reclaimed wood planks for a rustic farmhouse look, or salvage old tin ceiling tiles for a vintage-inspired aesthetic. Wine corks, bottle caps, or even broken dishes can be arranged into eye-catching mosaics.
For a industrial-chic vibe, repurpose corrugated metal sheets or old license plates. Book lovers might appreciate a backsplash made from vintage book pages sealed with resin. Penny tiles created from actual pennies can add a copper sheen to your kitchen.
Repurposed glass bottles, cut and arranged in a pattern, create a stunning translucent effect when backlit. Even items like buttons, beads, or computer keyboard keys can be transformed into unique backsplash designs. When working with repurposed materials, ensure proper sealing and protection against moisture and heat. With creativity and careful execution, these unconventional backsplash ideas can transform your kitchen while giving new life to discarded items.
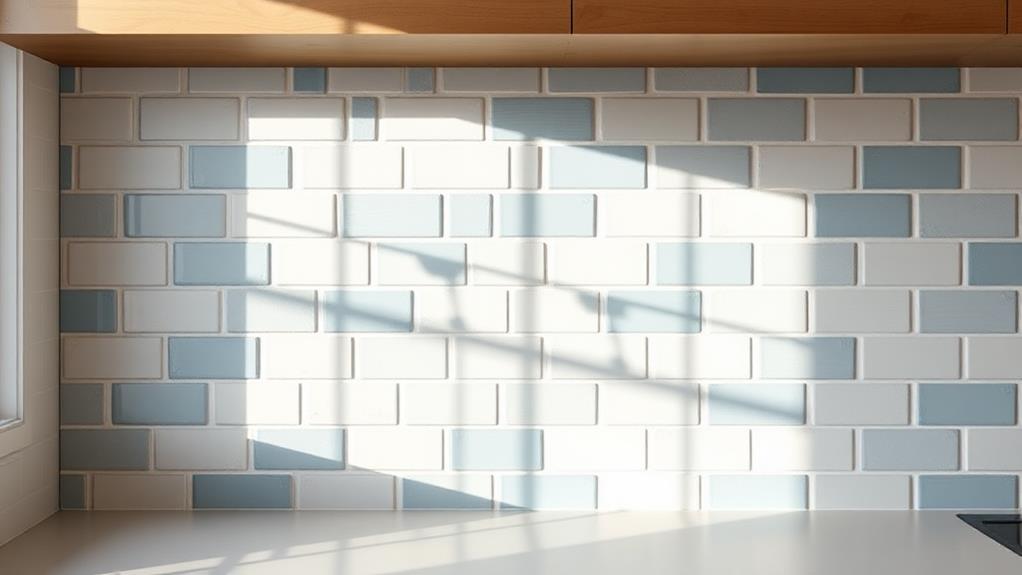
Textured Wallpaper Solutions
Textured wallpaper offers a versatile and cost-effective solution for creating a striking backsplash in your kitchen. With a wide variety of patterns, colors, and textures available, you can easily find an option that complements your existing décor.
Vinyl wallpapers are particularly suitable for kitchen environments due to their water-resistant properties and ease of cleaning.
To install a textured wallpaper backsplash, start by measuring the area and cutting the wallpaper to size. Clean the wall surface thoroughly and apply wallpaper adhesive according to the manufacturer's instructions. Carefully smooth the wallpaper onto the wall, working from the center outward to eliminate air bubbles.
For added protection against moisture and stains, consider applying a clear, waterproof sealant over the wallpaper once it has dried completely.
Some popular textured wallpaper options for backsplashes include faux brick, subway tile patterns, geometric designs, and nature-inspired motifs. These can mimic the look of more expensive materials like stone or tile at a fraction of the cost.
When selecting a textured wallpaper, consider the overall style of your kitchen and choose a design that enhances the space while providing visual interest and depth.
Temporary Contact Paper Designs
For those seeking a quick and easily reversible backsplash solution, temporary contact paper designs offer an attractive option. This budget-friendly approach allows homeowners to transform their kitchen or bathroom without the commitment of permanent installations. Contact paper, available in a wide range of patterns, colors, and textures, can mimic the appearance of more expensive materials like tile, stone, or metal.
To apply contact paper as a backsplash, start by thoroughly cleaning and drying the surface. Measure the area and cut the contact paper to size, leaving a small excess for adjustments. Carefully peel off the backing and apply the paper from top to bottom, smoothing out air bubbles as you go. Use a credit card or squeegee to ensure proper adhesion.
While contact paper is not heat-resistant, it can be applied around outlets and under cabinets with careful cutting. For added durability, consider applying a clear sealant over the contact paper. When it's time for a change, simply peel off the paper and start fresh. This DIY solution offers a low-cost way to update your space without the need for specialized tools or skills.
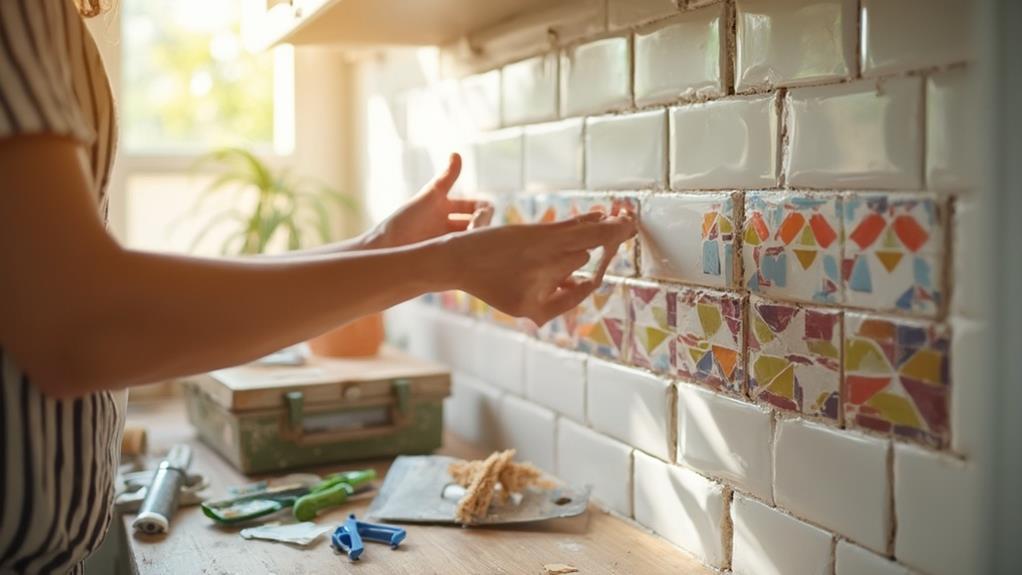
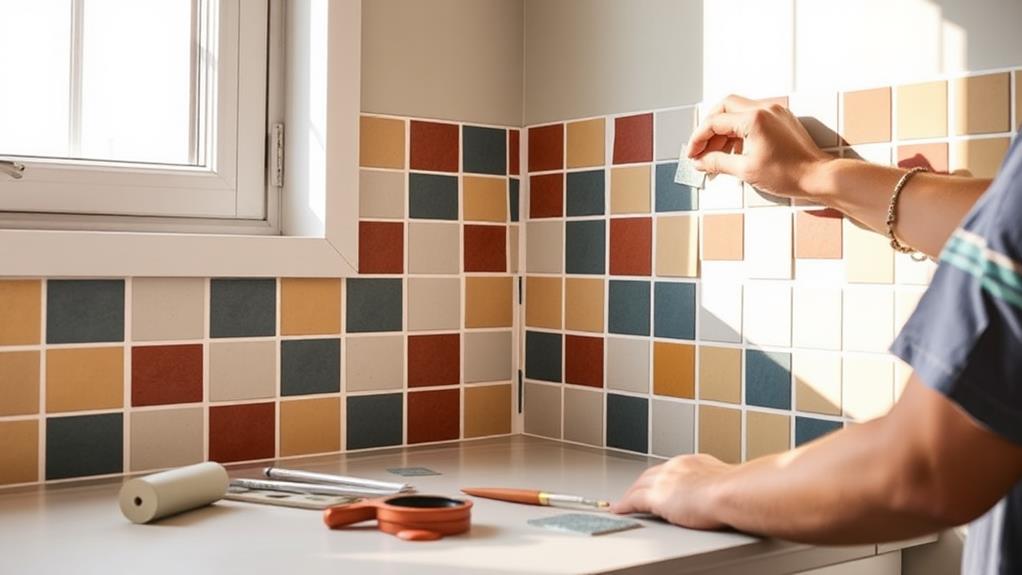
Mosaic With Affordable Materials
While contact paper offers a quick fix, creating a mosaic backsplash with affordable materials provides a more permanent and personalized solution. This approach allows you to unleash your creativity while staying within budget. Begin by selecting cost-effective materials such as ceramic tiles, glass beads, or even broken china pieces from thrift stores.
To create your mosaic, start with a sturdy backing board cut to fit your backsplash area. Apply tile adhesive to the board and arrange your chosen materials in a pattern or design of your choice. For a cohesive look, consider using a color scheme that complements your kitchen decor. Once the adhesive has dried, apply grout between the pieces to secure them and create a finished appearance.
For added savings, repurpose materials you already have on hand, such as old CDs, buttons, or seashells. These unconventional items can add unique texture and interest to your backsplash. Remember to seal the finished mosaic to protect it from moisture and make cleaning easier. With patience and creativity, you can craft a stunning, one-of-a-kind backsplash that reflects your personal style without breaking the bank.
Faux Tile Techniques
Faux tile techniques offer an affordable and versatile alternative to traditional tiling, allowing homeowners to achieve a high-end look without the associated costs or installation complexities. These methods typically involve using paint, stencils, or adhesive materials to mimic the appearance of ceramic or stone tiles.
One popular approach is using tile-patterned stencils and textured paint to create a tiled effect on a flat surface. This technique can be applied directly to drywall or over existing tiles.
Another option is peel-and-stick tile sheets, which come in various designs and are easy to install and remove. These adhesive tiles provide a quick solution for renters or those seeking a temporary update.
For a more tactile effect, 3D gel tiles or epoxy coatings can be applied to create a raised, glossy finish that closely resembles real tiles. Alternatively, faux tin ceiling tiles made of lightweight, paintable plastic can be cut to size and adhered to the backsplash area for a vintage-inspired look.
When implementing faux tile techniques, proper surface preparation and high-quality materials are crucial for achieving a realistic and durable result. With careful execution, these methods can transform a kitchen or bathroom backsplash at a fraction of the cost of traditional tiling.
Frequently Asked Questions
How Long Does a DIY Backsplash Typically Last Before Needing Replacement?
The longevity of a DIY backsplash depends on various factors, including materials used and installation quality. Generally, a well-installed backsplash can last 10-20 years. However, with proper maintenance and care, some may endure even longer before requiring replacement.
Can I Install a DIY Backsplash Over Existing Tiles?
Like a fresh coat of paint over a weathered canvas, installing a DIY backsplash over existing tiles is possible. However, proper surface preparation is crucial for adhesion. Consider factors like tile thickness and weight to ensure a successful and long-lasting installation.
What Tools Are Essential for Most DIY Backsplash Projects?
Essential tools for most DIY backsplash projects include a tile cutter, notched trowel, grout float, sponge, level, measuring tape, spacers, safety goggles, and adhesive. A wet saw may be necessary for complex cuts in certain materials.
Are There Any DIY Backsplash Options Suitable for Rental Properties?
Contrary to popular belief, renters have numerous backsplash options. Temporary solutions like peel-and-stick tiles, removable wallpaper, and magnetic panels offer customization without permanent alterations. These alternatives provide aesthetic appeal while respecting lease agreements and preserving security deposits.
How Do I Properly Clean and Maintain Different Types of DIY Backsplashes?
To properly clean and maintain DIY backsplashes, use appropriate cleaning solutions based on the material type. For tile, use mild soap and water. For peel-and-stick options, gently wipe with a damp cloth. Regularly seal grout lines to prevent staining.
Conclusion
In the kaleidoscope of DIY backsplash options, creativity reigns supreme. From peel-and-stick simplicity to repurposed material ingenuity, these budget-friendly solutions transform kitchens into personalized works of art. Like a painter's palette, the array of techniques offers endless possibilities for homeowners to express their style. With a dash of imagination and a pinch of elbow grease, even the most modest budgets can achieve a stunning backsplash that stands the test of time, turning everyday spaces into extraordinary havens of design.