To properly install attic insulation, start by assessing your current insulation and taking necessary safety precautions. Choose the right material based on your climate and budget. Prepare the attic space by clearing debris and addressing any moisture issues. Seal air leaks around penetrations and ensure proper ventilation. Lay the insulation between joists, taking care to maintain consistent coverage. Don't forget to insulate around obstacles like electrical boxes and chimneys. Address common problem areas such as attic hatches and recessed lighting. Regular maintenance will keep your insulation effective. Follow this guide for a comprehensive approach to maximizing your home's energy efficiency.
Assessing Your Current Attic Insulation

Before diving into any attic insulation project, it's crucial to assess your current situation. Start by inspecting your attic space, noting any existing insulation, its type, and thickness. Look for signs of moisture, mold, or pest infestations, as these issues need addressing before adding new insulation.
Measure the depth of your current insulation using a ruler or tape measure. Compare this to recommended R-values for your climate zone, which you can find on the Department of Energy's website. If your insulation falls short, you'll need to add more.
Check for air leaks around chimneys, vents, and where the attic floor meets the exterior walls. These gaps can significantly reduce insulation effectiveness. Examine the condition of your existing insulation, looking for compression, damage, or uneven distribution.
Assess your attic ventilation, ensuring there's proper airflow to prevent moisture buildup. Look for blocked soffit vents or inadequate roof vents. Finally, evaluate the accessibility of your attic space and any obstacles like wiring or ductwork that might complicate the insulation process. This thorough assessment will help you plan your insulation project effectively and identify any potential issues before you begin.
Safety Precautions and Equipment
When it comes to attic insulation, your safety should be the top priority. Before you begin any work, ensure you're wearing the right protective gear. Start with a respirator or dust mask to prevent inhalation of insulation fibers and dust.
Dress in long sleeves and pants to minimize skin exposure. Sturdy, closed-toe shoes will protect your feet from potential hazards. If you're working with fiberglass insulation, consider wearing a disposable coverall suit for full-body protection.
Protect your eyes from debris with protective goggles, and put on thick work gloves to protect your hands from sharp edges and irritants.
Ensure proper lighting in your attic workspace. Use a headlamp or portable work light to keep your hands free. Create a stable walking surface by laying plywood boards across the joists. This will help prevent you from accidentally stepping between rafters and falling through the ceiling.
Ventilation is crucial. If possible, use a fan to improve air circulation in the attic. Keep a first aid kit nearby in case of minor injuries. Lastly, if you encounter any electrical wiring or suspect the presence of asbestos, stop work immediately and consult a professional.
Selecting the Right Insulation Material
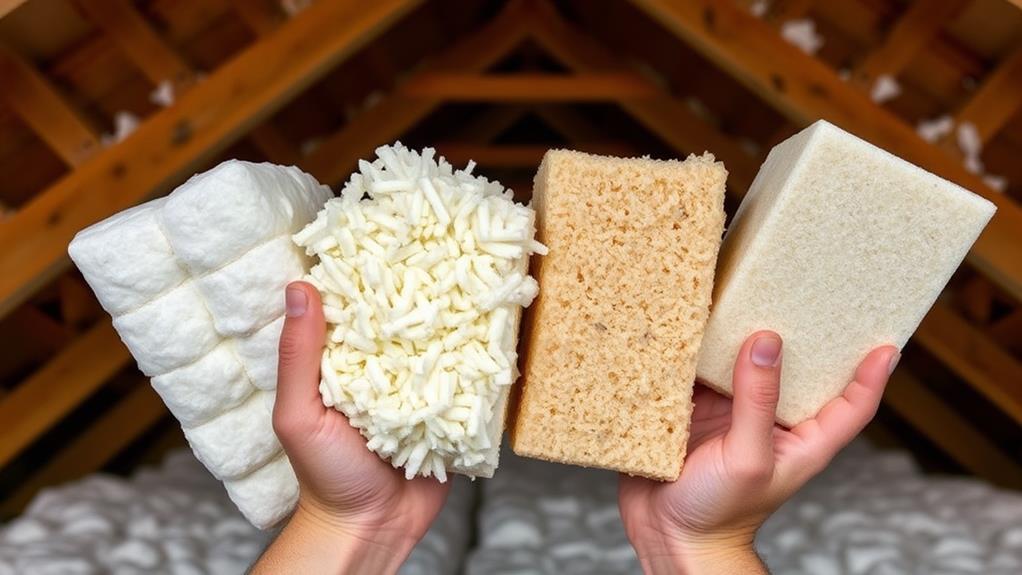
Choosing the right insulation material for your attic is crucial for maximizing energy efficiency and comfort in your home. The most common options include fiberglass, cellulose, and spray foam insulation. Each has its own benefits and drawbacks.
Fiberglass is affordable and easy to install, coming in batts or loose-fill forms. It's fire-resistant but can irritate skin and lungs during installation.
Cellulose, made from recycled paper products, is eco-friendly and provides excellent sound insulation. It's treated for fire resistance but can settle over time, reducing its effectiveness.
Spray foam insulation offers the highest R-value per inch and creates an air-tight seal, but it's more expensive and requires professional installation. Consider factors like your climate, budget, and existing insulation when making your choice.
You'll also need to determine the required R-value for your region. This measure of thermal resistance varies depending on your location and local building codes. Check with your local energy office or consult the Department of Energy's guidelines to ensure you're meeting the recommended insulation levels for your area.
Preparing Your Attic Space
Proper preparation of your attic space is crucial before installing insulation. Start by clearing out any stored items and debris from the area. This will give you a clean workspace and prevent potential fire hazards.
Next, inspect the attic for any signs of moisture, mold, or pest infestations. Address these issues before proceeding with insulation installation.
Ensure proper ventilation by checking that existing vents are unobstructed and functioning correctly. Install additional vents if necessary to maintain proper airflow. Seal any air leaks around chimneys, pipes, and electrical fixtures using caulk or foam sealant. This step prevents heat loss and moisture problems.
Examine the electrical wiring in your attic. If you find any damaged or outdated wiring, have it repaired or replaced by a licensed electrician. Install protective barriers around recessed lighting fixtures to prevent overheating.
Lastly, measure the depth of your existing insulation and calculate the R-value. This information will help you determine how much additional insulation you'll need to meet recommended levels for your climate zone. With these preparations complete, you'll be ready to move forward with installing your chosen insulation material.
Sealing Air Leaks
Before installing insulation, it's crucial to address air leaks in your attic. These leaks can significantly reduce the effectiveness of your insulation and lead to higher energy bills.
Start by inspecting your attic space for gaps, cracks, and holes. Common areas to check include around chimneys, plumbing vents, electrical wires, and recessed lighting fixtures.
To seal these leaks, you'll need caulk, expanding foam, and weather stripping. Apply caulk to small gaps and cracks, using a caulk gun for precise application. For larger openings, use expanding foam insulation, which will fill and seal the space effectively.
Don't forget to seal around attic hatches or pull-down stairs with weather stripping to prevent air leakage.
Pay special attention to areas where different building materials meet, such as where the walls join the attic floor. These junctions are often prone to air leaks. For metal flues or chimneys, use fire-rated caulk or metal flashing to seal gaps safely.
Remember to wear protective gear, including gloves and a dust mask, when working in your attic. Proper sealing will ensure your insulation performs optimally.
Installing Proper Attic Ventilation
Adequate ventilation is a cornerstone of effective attic insulation. It helps regulate temperature and moisture levels, preventing heat buildup in summer and ice dams in winter. To install proper attic ventilation, you'll need to calculate the required ventilation area based on your attic's square footage.
Start by adding soffit vents along the eaves. These allow cool air to enter the attic space. Next, install ridge vents along the peak of your roof to let hot air escape. If ridge vents aren't possible, consider gable vents or roof vents as alternatives. Ensure there's a clear path for air to flow from the soffits to the upper vents.
Don't forget to install baffles at the eaves to prevent insulation from blocking airflow. These plastic or foam channels maintain an open passage for air to circulate. When installing vents, follow manufacturer instructions carefully and use appropriate flashing to prevent water infiltration.
Laying the Insulation

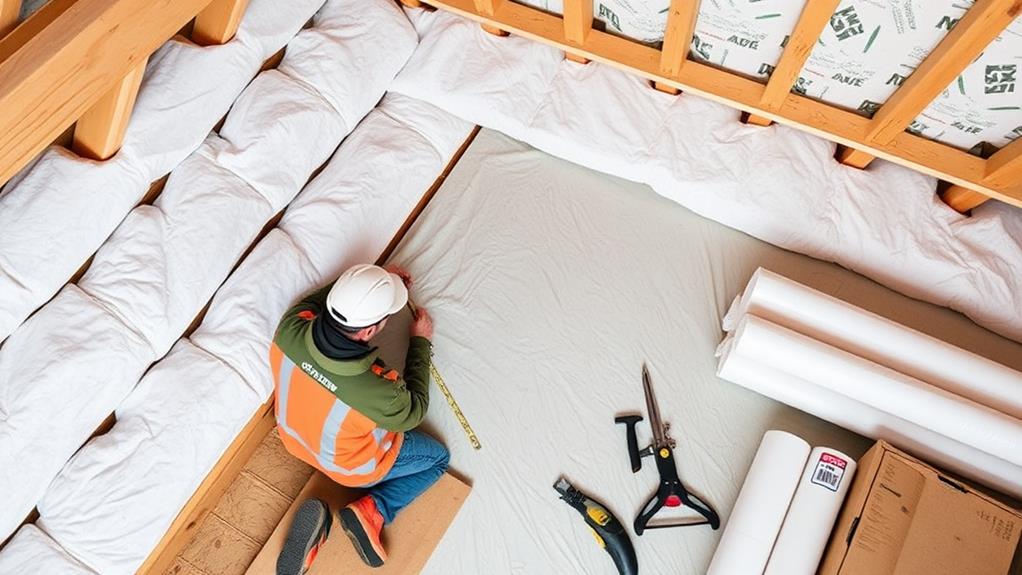
Laying insulation is a critical step in creating an energy-efficient attic space. Before you begin, ensure you're wearing protective gear, including gloves, a dust mask, and safety goggles. Start by measuring the space between joists to determine the width of insulation needed. Cut the insulation to fit snugly between joists, leaving no gaps.
If you're using batts or rolls, place them with the vapor barrier facing down towards the living space. For loose-fill insulation, use a blowing machine to evenly distribute it across the attic floor. Be careful not to compress the insulation, as this reduces its effectiveness.
Pay special attention to areas around electrical fixtures, pipes, and vents. Use wire mesh or aluminum flashing to create barriers around these objects, maintaining a 3-inch clearance for safety. Don't forget to insulate the attic hatch or door.
For optimal performance, install multiple layers of insulation, alternating the direction to cover gaps. Aim for the recommended R-value for your climate zone, typically between R-30 and R-60. Remember, proper insulation depth is crucial for maximizing energy efficiency and comfort in your home.
Insulating Around Obstacles
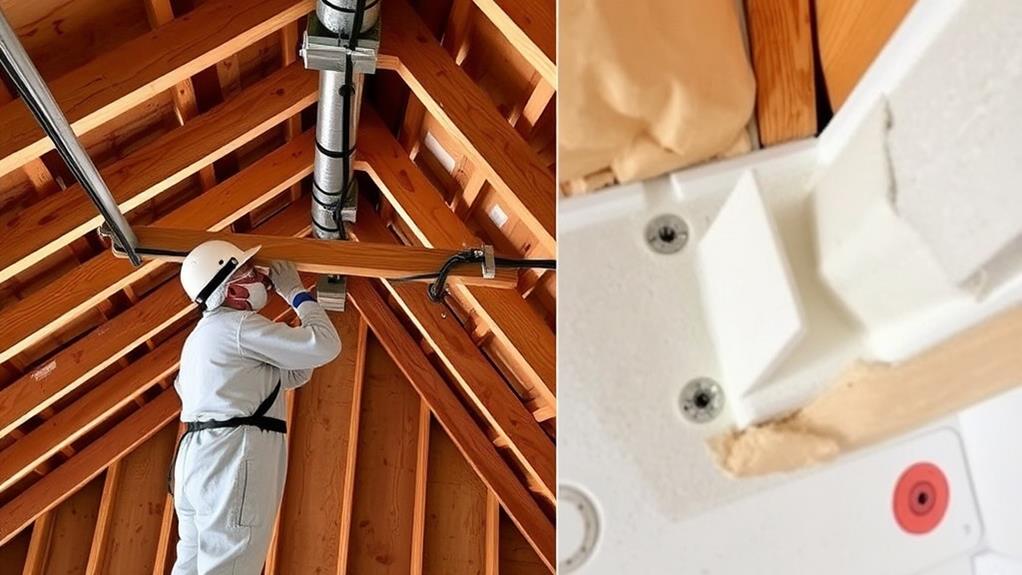
Numerous obstacles in your attic can complicate the insulation process, but they shouldn't be overlooked. Common obstructions include electrical junction boxes, recessed lighting fixtures, ventilation ducts, and chimney flues. To insulate around these elements safely and effectively, you'll need to take specific precautions.
For electrical boxes, cut the insulation to fit snugly around them, leaving a small gap to prevent overheating. When dealing with recessed lighting, maintain a 3-inch clearance around the fixture unless it's rated for insulation contact (IC). Use wire mesh or sheet metal to create a barrier around non-IC fixtures.
Ventilation ducts require special attention. Insulate beneath and around them, but don't compress the insulation. For chimney flues, use fire-resistant materials like rock wool or unfaced fiberglass batts, maintaining at least a 3-inch clearance from the flue pipe.
Don't forget about attic access points. Install an insulated attic hatch cover or add weatherstripping to prevent heat loss. For pull-down stairs, consider using an insulated attic stair cover.
Addressing Common Attic Problem Areas

Beyond the typical insulation challenges, attics often harbor specific problem areas that require extra attention. You'll need to address these issues to ensure your insulation performs optimally. Start by examining the attic hatch or door. Install weatherstripping around its edges and add a layer of rigid foam insulation to the back of the hatch to prevent heat loss.
Next, focus on recessed lighting fixtures. If they're not rated for insulation contact (IC), create a barrier around them using wire mesh or aluminum flashing, leaving at least 3 inches of clearance. For non-IC rated fixtures, cover them with a box made of fire-resistant material.
Don't overlook knee walls, which are short vertical walls with attic space directly behind them. Insulate these walls and the floor of the attic space behind them to create a continuous thermal barrier.
For chimneys and flues, use metal flashing to create a barrier between the insulation and the hot surface, maintaining a 2-inch clearance.
Lastly, pay attention to soffit vents. Install baffles to maintain airflow and prevent insulation from blocking these crucial ventilation points. By addressing these common problem areas, you'll significantly improve your attic's insulation effectiveness.
Maintaining Your Attic Insulation
Three key steps will help you maintain your attic insulation's effectiveness over time. First, conduct regular inspections. Check your attic at least twice a year, looking for signs of moisture, pests, or damaged insulation. Pay close attention to areas around vents, chimneys, and any penetrations in the roof.
Second, address issues promptly. If you spot wet or compressed insulation, replace it immediately to prevent mold growth and reduced efficiency. Seal any air leaks you find, as these can significantly impact your insulation's performance. Don't forget to repair or replace damaged vapor barriers to maintain proper moisture control.
Lastly, keep your attic well-ventilated. Proper airflow prevents heat and moisture buildup, which can degrade insulation over time. Ensure your soffit and ridge vents are clear of debris and functioning correctly. If you have a powered attic fan, test it regularly to confirm it's working as intended.
Conclusion
You've now got the knowledge to properly insulate your attic, saving energy and money while improving your home's comfort. Remember to regularly inspect and maintain your insulation for optimal performance. Did you know that a well-insulated attic can reduce your home's energy consumption by up to 30%? That's a significant impact on both your wallet and the environment. Don't wait – start your attic insulation project today and reap the benefits for years to come.