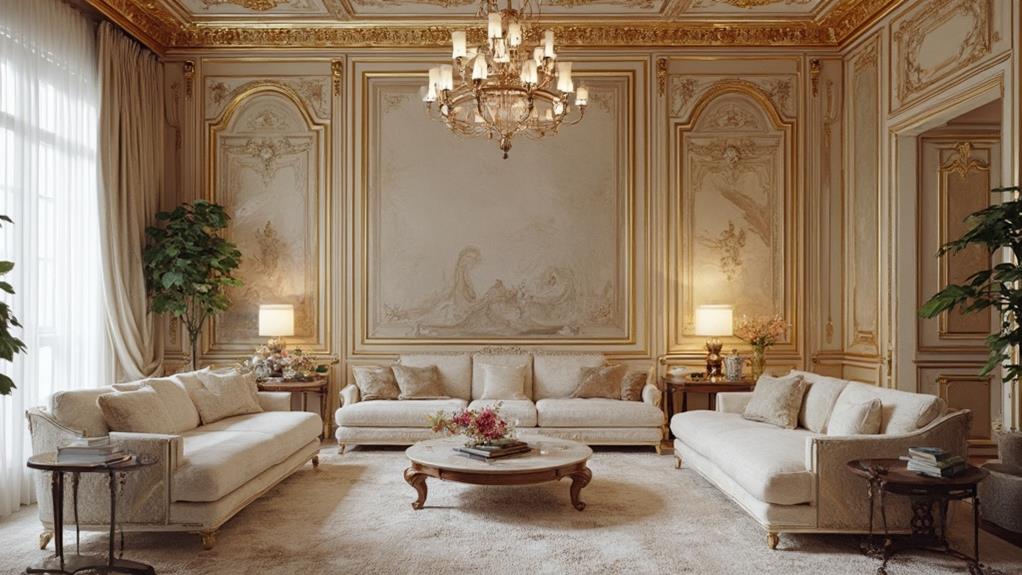
Faux finishes offer a budget-friendly way to achieve luxurious looks in your home. From marbling techniques that mimic expensive stone to metallic glazes that add shine, these methods can transform ordinary surfaces into eye-catching features. Wood grain effects, textured walls, and faux leather finishes bring warmth and sophistication without the high cost. Gilded accents, aged patinas, and stenciled designs add character and visual interest. With the right tools and techniques, DIY enthusiasts can master various faux finish applications, including color washing, ragging, and Venetian plastering. By exploring these affordable options, homeowners can create stunning spaces that rival high-end interiors.
Marbling Magic
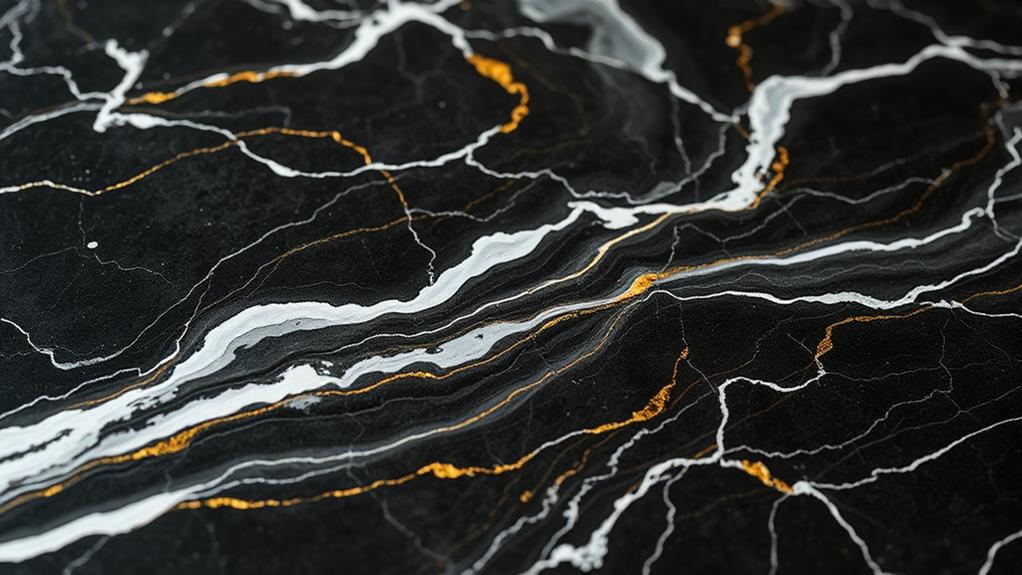
While authentic marble surfaces can be prohibitively expensive, marbling techniques offer a cost-effective alternative to achieve a similar luxurious appearance. This decorative painting method replicates the natural veining and color variations found in genuine marble, creating a convincing illusion on various surfaces.
To execute a marbling finish, begin with a smooth base coat that matches the primary color of the desired marble. Once dry, use specialized tools like feathers, sponges, or brushes to apply thin layers of paint in complementary shades, mimicking the intricate patterns of real marble. The key to a realistic result lies in subtle color transitions and organic vein formations.
Advanced techniques involve using glazes and tinted varnishes to add depth and sheen, enhancing the illusion of a polished stone surface. Marbling can be applied to walls, furniture, columns, and even countertops, transforming ordinary spaces into opulent environments. With practice and patience, DIY enthusiasts can master this technique, though professional painters often achieve the most convincing results. Proper sealing ensures durability, allowing the faux marble finish to withstand daily wear and maintain its elegant appearance for years.
Metallic Shine on a Dime
Metallic finishes exude opulence and sophistication, but they don't have to come with a hefty price tag. With the right techniques and materials, you can achieve a luxurious metallic shine on a budget. Start by selecting a metallic paint or glaze in your desired hue, such as gold, silver, or copper. For best results, choose a water-based product that's easy to work with and provides good coverage.
Before applying the metallic finish, prepare the surface by cleaning, sanding, and priming it. This ensures a smooth base for the metallic coat. Apply the metallic paint or glaze using a foam roller or brush, working in thin, even layers. For added depth and texture, consider using techniques like dry brushing or rag rolling to create subtle variations in the metallic sheen.
To enhance the luxurious effect, experiment with layering different metallic shades or incorporating stencils for intricate patterns. For a more dramatic look, try applying a dark base coat before the metallic layer to create depth and richness. Finally, protect your faux metallic finish with a clear topcoat to ensure longevity and maintain its lustrous appearance.
Wood Grain Without the Pain

Why spend a fortune on genuine wood when you can create a convincing wood grain effect for a fraction of the cost? Faux wood grain techniques allow homeowners to achieve the warmth and elegance of real wood without the hefty price tag or maintenance requirements.
To create a wood grain effect, start with a base coat that matches the desired wood tone. Once dry, apply a glaze in a slightly darker shade using a wood graining tool or brush. The key is to mimic natural wood patterns by creating long, flowing strokes that follow the direction of real wood grain. For added realism, incorporate knots and irregularities using a small brush or sponge.
Various tools can enhance the wood grain effect, including combs, rags, and even household items like cardboard or rubber bands. Experiment with different techniques to achieve the desired look, whether it's oak, mahogany, or pine. Once satisfied with the result, seal the finish with a clear topcoat to protect and preserve the faux wood grain. This affordable alternative allows you to enjoy the aesthetic appeal of wood in any room without breaking the bank.
Textured Walls With Depth
Beyond paint colors, adding texture to walls can create depth and visual interest in any room. Faux textured finishes offer an affordable alternative to expensive materials like stone or plaster. Popular techniques include sponging, ragging, and stippling, which use simple tools to apply paint in layered patterns.
For a subtle texture, try color washing. This technique involves applying a translucent glaze over a base coat, creating a soft, dimensional effect. More dramatic results can be achieved with Venetian plaster, a trowel-applied finish that mimics polished marble or limestone. For an industrial look, consider a concrete-inspired finish using specialized paints and application methods.
Textured wallpapers provide another option for adding depth without the need for painting skills. From grasscloth to embossed vinyl, these wallcoverings offer a wide range of textures and patterns. For a DIY approach, try creating a raised stencil design using joint compound before painting.
When adding texture, consider the room's lighting and existing decor. Textured walls can enhance architectural features or compensate for a lack thereof, making them versatile for various interior design styles.
Faux Leather Elegance
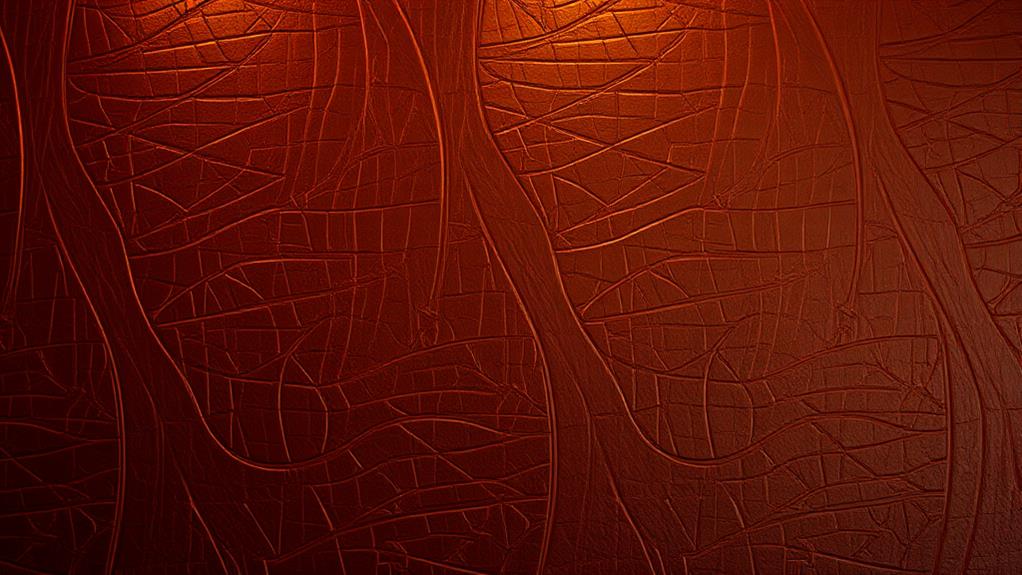
Leather has long been associated with luxury and sophistication in interior design, but authentic leather can be prohibitively expensive. Faux leather finishes offer a cost-effective alternative that can bring the same level of elegance to your space. This technique involves applying specialized paints and glazes to create a realistic leather-like texture on walls, furniture, or accessories.
To achieve a convincing faux leather look, start with a base coat in your desired leather color. Once dry, apply a glaze using a sponge or rag to create subtle variations in tone. Next, use a textured roller or stamp to imprint a leather-like pattern onto the surface. For added realism, incorporate creases and wrinkles by gently manipulating the wet glaze.
Advanced techniques include adding highlights and shadows to mimic the natural sheen of leather, and applying a protective topcoat for durability. Faux leather finishes work particularly well in studies, home offices, or as accent walls in living rooms. With proper execution, this technique can transform ordinary surfaces into luxurious-looking elements that rival the real thing, all while staying within budget.
Stone and Concrete Illusions
Stone and concrete surfaces exude a timeless, industrial chic that many homeowners desire. However, installing genuine stone or concrete can be costly and labor-intensive. Fortunately, faux stone and concrete finishes offer an affordable alternative that closely mimics the real thing.
To achieve a stone-like appearance, start with a textured base coat applied with a roller or trowel. Then, use sponges or specialized brushes to layer different shades of paint, creating depth and variation. For a more realistic look, consider adding faux grout lines or using stencils to replicate specific stone patterns.
Concrete effects can be created using specialized paints or textured coatings. Apply the product with a trowel, roller, or spray gun, depending on the desired finish. For an authentic industrial look, incorporate subtle color variations and intentional imperfections.
Both faux stone and concrete finishes can be further enhanced with techniques like distressing, burnishing, or adding metallic accents. These methods add depth and character to the surface, making it even more convincing. With proper sealing, these faux finishes can be durable and long-lasting, providing the luxurious look of stone or concrete without the hefty price tag.
Gilded Glamour for Less
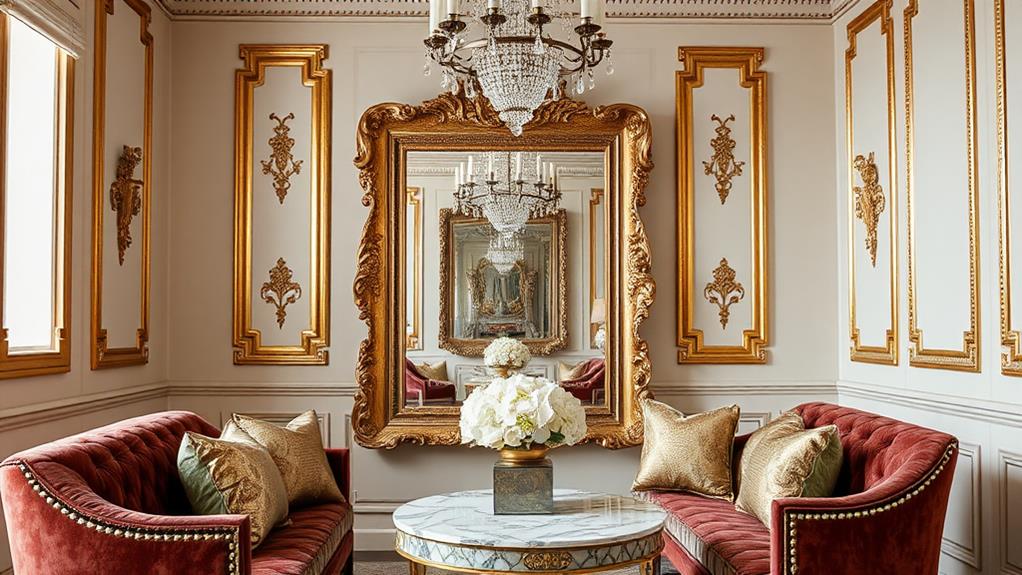
Gilding has long been associated with opulence and luxury, but achieving this lavish look doesn't have to break the bank. With modern faux gilding techniques, homeowners can create stunning gold-leafed effects at a fraction of the cost of traditional methods. DIY enthusiasts can use metallic paints, gold leaf sheets, or even gold foil to achieve a gilded appearance on various surfaces, including furniture, picture frames, and architectural details.
To create a convincing gilded finish, start by preparing the surface with a smooth base coat. Apply an adhesive size for gold leaf application or use a metallic paint as a foundation. For a more authentic look, consider adding subtle imperfections or distressing to mimic the patina of aged gilding. Experiment with different shades of gold, from warm yellow to cool white gold, to suit your decor style.
Combine gilded elements with other faux finishes, such as marble or wood grain, for a truly luxurious effect. Remember that a little gilding goes a long way – strategically applying gold accents can elevate a space without overwhelming it. With patience and attention to detail, you can achieve a high-end gilded look that rivals expensive professional treatments.
Aged and Distressed Finishes
With a nod to the past, aged and distressed finishes bring character and timeless appeal to modern interiors. These techniques can transform new furniture and decor into pieces that appear to have weathered the test of time, adding depth and interest to your space.
To achieve an aged look, start with a base coat of paint, then apply a contrasting color over it. Once dry, use sandpaper or steel wool to selectively remove the top layer, revealing the underlying hue. This creates a worn, vintage appearance. For a distressed finish, deliberately damage the surface by using tools like hammers, chains, or wire brushes before painting.
Crackle medium is another effective method for creating an antique look. Apply it between two contrasting paint colors to produce a network of fine cracks. Alternatively, milk paint can naturally chip and flake, mimicking years of wear.
When working with wooden surfaces, consider using techniques like pickling or cerusing to highlight the grain and create a weathered appearance. These methods involve applying a light-colored wash or rubbing a contrasting pigment into the wood's pores, respectively.
Stenciled Patterns and Designs
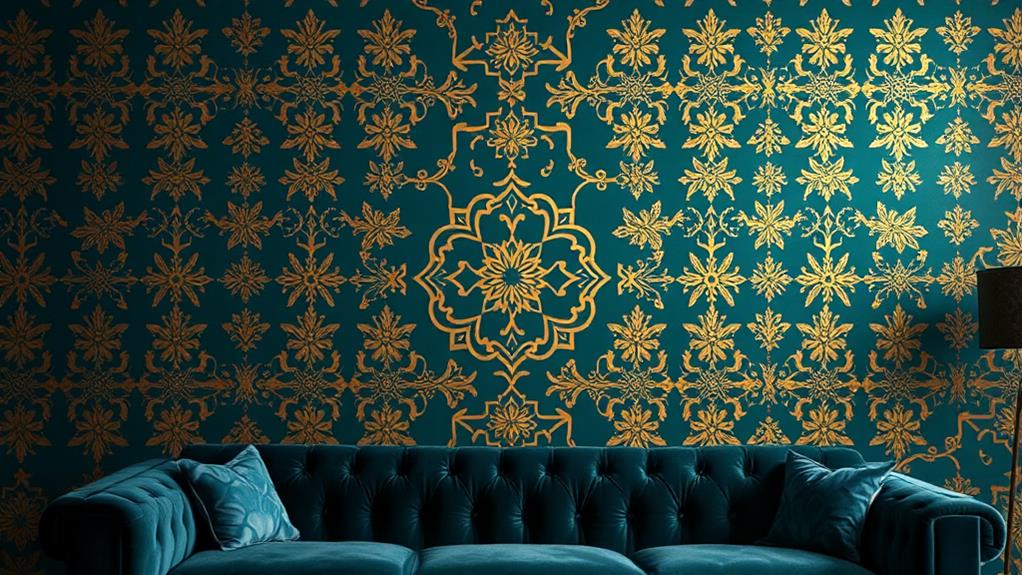
Creating intricate patterns and designs through stenciling offers a cost-effective way to add visual interest and luxury to walls, furniture, and accessories. This technique allows homeowners to achieve high-end looks without the expense of custom wallpaper or hand-painted murals. Stencils come in a wide variety of styles, from classic damask and geometric patterns to contemporary motifs and nature-inspired designs.
To begin stenciling, select a pattern that complements your existing decor and prepare the surface by cleaning and priming if necessary. Use repositionable spray adhesive to secure the stencil and prevent paint bleed. Apply paint with a foam roller or stencil brush, using a light touch to avoid excess paint buildup. For multi-color designs, allow each layer to dry completely before applying the next.
Advanced techniques include overlapping stencils for a more complex look, using metallic paints for added shimmer, or incorporating texture mediums for a raised effect. Stenciling can transform plain walls, breathe new life into old furniture, or add decorative touches to smaller items like picture frames and lampshades. With practice and patience, even novice DIYers can achieve professional-looking results that rival expensive custom finishes.
Tools and Techniques
Numerous tools and techniques are essential for successfully achieving faux finishes that mimic luxury materials. Basic tools include various types of paintbrushes, rollers, sponges, and rags. Specialized tools like graining combs, stippling brushes, and glazing brushes help create specific textures and effects. For more advanced techniques, consider investing in a paint sprayer or texture rollers.
Key techniques include color washing, ragging, sponging, and dragging. Color washing involves applying a translucent glaze over a base coat, creating a soft, watercolor-like effect. Ragging utilizes crumpled rags to apply or remove paint, producing a mottled texture. Sponging creates a variegated appearance by dabbing paint with natural or synthetic sponges. Dragging involves pulling a dry brush through wet glaze to create linear patterns.
More complex techniques include marbling, wood graining, and Venetian plastering. These methods require practice and specialized tools to achieve convincing results. Regardless of the chosen technique, proper surface preparation is crucial. Always clean, repair, and prime surfaces before applying faux finishes. Experiment with different tools and techniques on sample boards to perfect your skills before tackling larger projects.
Frequently Asked Questions
How Long Do Faux Finishes Typically Last Before Needing Touch-Ups or Reapplication?
The longevity of faux finishes varies depending on technique, materials, and environmental factors. Generally, well-applied faux finishes can last 5-10 years before requiring touch-ups. High-traffic areas may need attention sooner, while protected surfaces can endure longer.
Are Faux Finishes Safe for Use in Homes With Pets or Children?
Like a protective shield, most modern faux finishes are safe for homes with pets and children. They typically use low-VOC or water-based products, making them non-toxic and durable. However, always check product labels and consult professionals for specific concerns.
Can Faux Finishes Be Applied Over Existing Wallpaper or Textured Surfaces?
Faux finishes can be applied over existing wallpaper or textured surfaces, but proper preparation is crucial. Ensure surfaces are clean, stable, and primed. Some techniques may require additional steps or specialized products for optimal adhesion and appearance.
What's the Average Cost Difference Between Real Materials and Their Faux Counterparts?
The cost difference between real materials and faux alternatives varies widely. Generally, faux finishes can be 30-70% less expensive than their authentic counterparts. However, exact savings depend on the specific materials and techniques used.
Are There Any Faux Finishes That Work Well in High-Humidity Areas Like Bathrooms?
Several faux finishes are suitable for high-humidity bathrooms. Moisture-resistant options include venetian plaster, textured paint techniques, and specialty coatings that mimic stone or tile. These finishes offer durability and visual appeal while withstanding bathroom conditions effectively.
Conclusion
Faux finishes furnish frugal yet fabulous solutions for discerning decorators. Mastering marbling, metallic, and wood grain techniques transforms tired spaces into timeless treasures. Textured walls and leather-like looks lend lavish luxury without lofty price tags. Gilded glamour and artfully aged accents add allure affordably. Stenciled styles showcase sophisticated designs. With proper tools and techniques, DIY devotees can craft captivating, custom interiors that rival high-end habitats. These clever, cost-effective methods make magnificent makeovers accessible to all aspiring aesthetes.