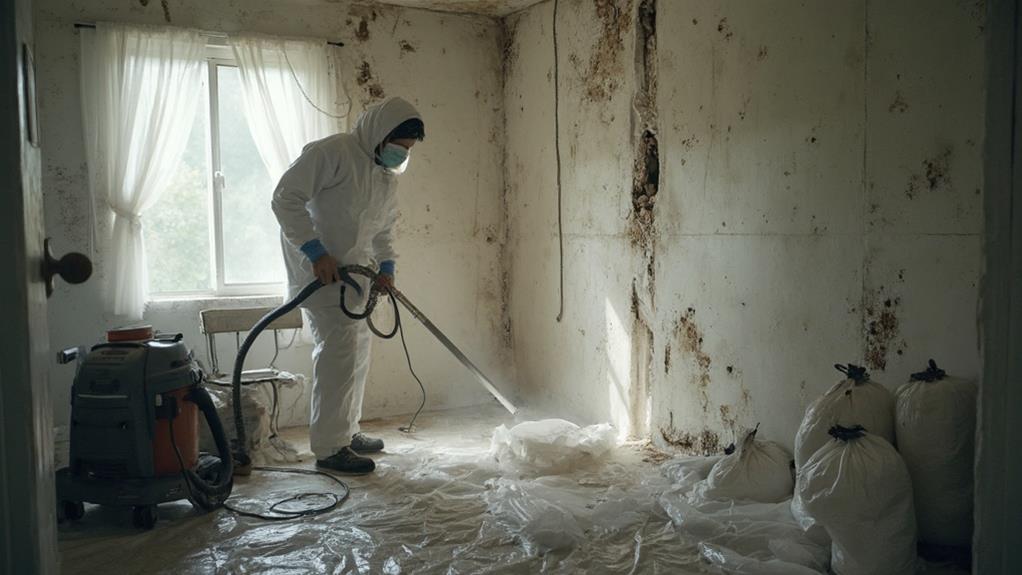
Removing and disposing of mold-contaminated materials requires careful planning and execution. Start by identifying affected areas through visual inspection and containing them with plastic sheeting. Wear protective gear, including an N95 respirator, gloves, and eye protection. Remove porous materials like drywall and carpeting entirely, while cleaning non-porous surfaces with detergent and EPA-registered fungicides. Use HEPA vacuums to capture loose spores. Double-bag all contaminated materials in heavy-duty plastic bags for safe disposal. Clean and disinfect the area thoroughly, then ensure proper ventilation and humidity control to prevent future growth. The following steps will guide you through a comprehensive mold remediation process.
Identifying Mold-Contaminated Materials
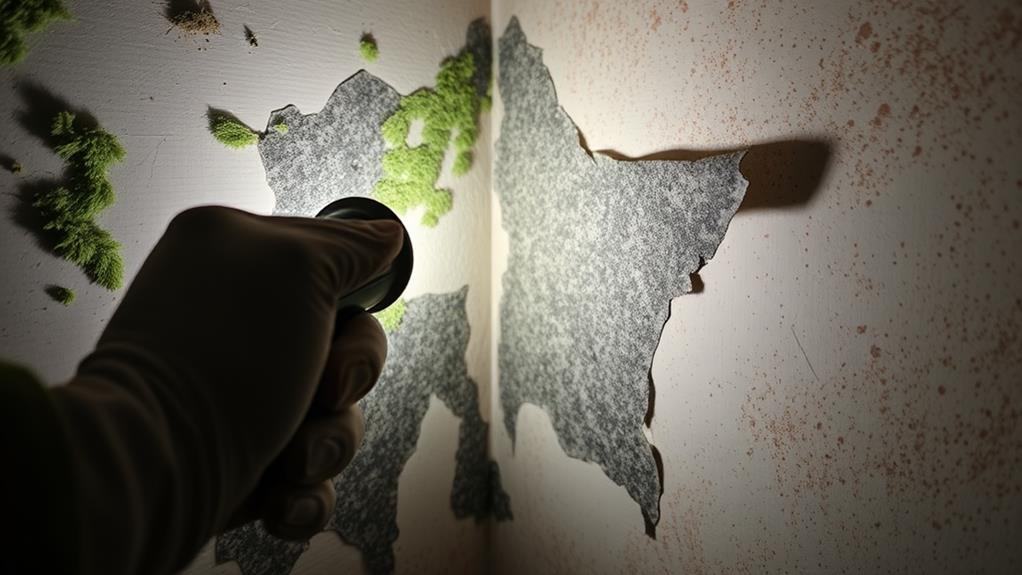
Identifying mold-contaminated materials is a crucial first step in the remediation process. Visual inspection is the primary method for detecting mold growth, often appearing as discoloration or staining on surfaces. Common materials susceptible to mold contamination include drywall, carpeting, wood, and ceiling tiles.
Look for signs of water damage, as these areas are prone to mold growth. Musty odors can also indicate hidden mold problems.
Use moisture meters to detect excess moisture in building materials, as this can reveal potential mold growth areas. In some cases, surface sampling may be necessary to confirm mold presence or identify specific species. However, sampling should be conducted by professionals and is not always required for remediation.
When assessing the extent of contamination, consider both visible mold and hidden growth behind walls or under flooring. Porous materials with visible mold growth often need to be removed entirely, while non-porous surfaces may be cleaned and disinfected. Always prioritize safety by wearing appropriate personal protective equipment (PPE) during the identification process, including gloves, goggles, and respiratory protection. Proper identification ensures effective remediation strategies and helps prevent future mold issues.
Safety Precautions and Protective Gear
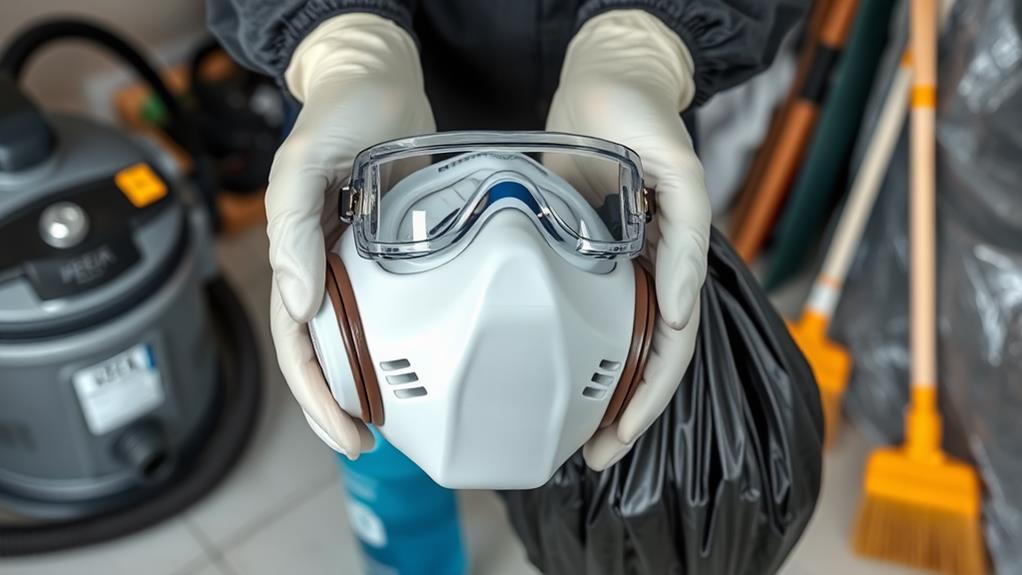
Before beginning the mold removal process, proper safety precautions and protective gear are paramount. Mold spores can be harmful when inhaled or in contact with skin, so adequate protection is essential.
Wear a properly fitted N95 respirator mask to prevent inhalation of mold spores. Disposable gloves, preferably made of nitrile or neoprene, should be used to protect hands from direct contact with mold. Eye protection, such as goggles or safety glasses, is necessary to shield eyes from airborne spores and debris.
Wear protective clothing, including long sleeves and pants, to minimize skin exposure. Disposable coveralls or old clothes that can be discarded after use are ideal. Ensure footwear is closed-toe and can be easily cleaned or disposed of after the removal process.
Proper ventilation is crucial during mold removal. Open windows and use fans to direct air outside the affected area. Seal off the work area with plastic sheeting to prevent spores from spreading to uncontaminated parts of the building.
Always work in well-lit conditions to clearly see the extent of mold growth and ensure thorough removal. Have a first aid kit readily available in case of accidents or exposure.
Required Tools and Equipment
Several essential tools and equipment are necessary for effective mold removal and disposal. A HEPA vacuum cleaner is crucial for capturing mold spores and preventing their spread during cleanup. Plastic sheeting and duct tape are required to create containment barriers, isolating the affected area from the rest of the building. Disposable bags, preferably heavy-duty contractor bags, are needed for safely containing and disposing of contaminated materials.
For cleaning and disinfection, you'll need scrub brushes, sponges, and spray bottles. A mold-specific biocide or an EPA-registered fungicide is essential for treating affected surfaces. Moisture meters and humidity gauges help identify the source of moisture and monitor drying progress. Dehumidifiers and fans aid in reducing humidity and promoting air circulation.
For larger remediation projects, consider renting specialized equipment such as air scrubbers with HEPA filtration to improve air quality during the cleanup process. A shop vacuum with a HEPA filter can be useful for removing loose debris. Lastly, ensure you have proper lighting, such as work lamps or headlamps, to thoroughly inspect and clean all affected areas.
Containing the Affected Area
Proper containment strategies are essential when addressing mold-contaminated areas to prevent the spread of spores to unaffected parts of the building. Begin by sealing off the affected area using heavy-duty plastic sheeting and duct tape. Cover all doorways, windows, and vents to create an airtight barrier.
For larger areas, consider constructing a containment chamber using polyethylene sheeting and PVC pipes.
Establish a decontamination area at the entrance of the containment zone. This area should include a clean room, dirty room, and shower area for workers to remove contaminated protective equipment before exiting. Use negative air pressure within the containment area by employing HEPA-filtered air scrubbers. This prevents contaminated air from escaping into clean areas of the building.
Implement a double-bag system for removing contaminated materials. Place items in sealed plastic bags within the containment area, then transfer them to a second clean bag in the decontamination zone. Dispose of these bags according to local regulations. Regularly inspect and maintain the containment barriers throughout the remediation process, repairing any breaches immediately to ensure continued effectiveness.
Removal Techniques for Various Materials
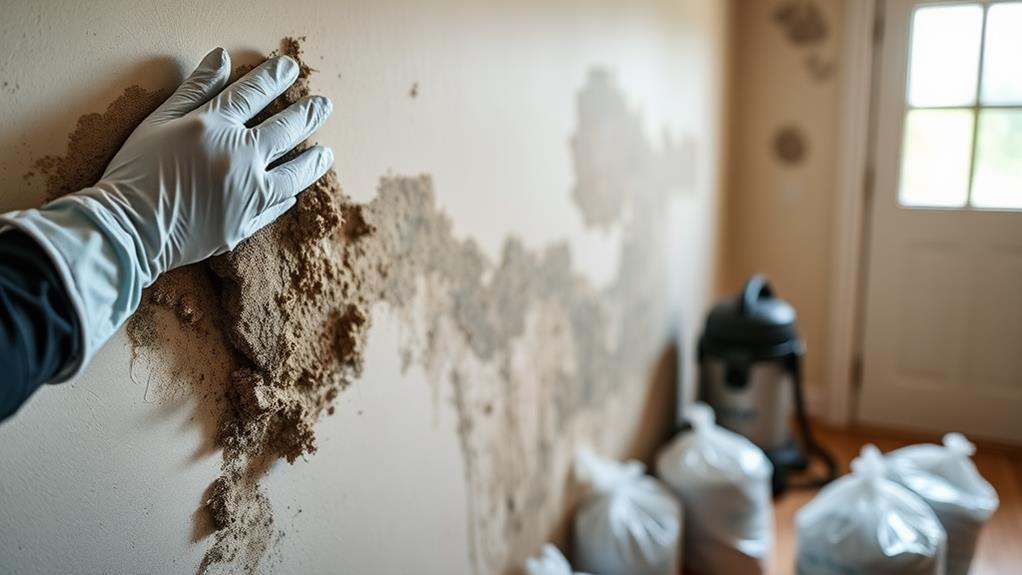
When addressing mold-contaminated materials, different removal techniques are required based on the type of surface affected. For porous materials like drywall, carpeting, and insulation, complete removal and replacement are often necessary, as mold can penetrate deeply into these surfaces. Cut out and dispose of affected drywall, extending at least 12 inches beyond visible mold growth. Remove and discard contaminated carpeting and padding.
For semi-porous materials such as wood and concrete, surface cleaning may be sufficient if the mold growth is not extensive. Use a wire brush or sandpaper to remove visible mold, then clean with a detergent solution. For non-porous surfaces like glass, metal, and plastic, thorough cleaning with appropriate cleaning agents is typically effective. Use a mixture of water and detergent, scrubbing vigorously to remove all traces of mold.
HEPA vacuuming is an essential step for all affected surfaces, helping to remove loose mold spores. For stubborn mold growth, consider using specialized mold removal products or seeking professional assistance. Always wear appropriate personal protective equipment, including gloves, goggles, and respiratory protection, when handling mold-contaminated materials.
Cleaning and Disinfecting Procedures
After removing mold-contaminated materials, thorough cleaning and disinfection of the affected areas are crucial steps in remediation. Begin by vacuuming all surfaces using a HEPA filter-equipped vacuum cleaner to remove loose spores and debris.
Next, scrub non-porous surfaces with a detergent solution to remove any remaining mold residue.
For disinfection, use an EPA-registered antimicrobial product specifically designed for mold remediation. Follow the manufacturer's instructions for dilution and application. Common disinfectants include bleach solutions, hydrogen peroxide, and quaternary ammonium compounds. Apply the disinfectant to all affected surfaces and allow it to dwell for the recommended contact time.
After disinfection, thoroughly dry the area using dehumidifiers, fans, and increased ventilation. Moisture control is essential to prevent future mold growth. For porous materials that cannot be fully cleaned, such as drywall or carpeting, removal and replacement may be necessary.
Always wear appropriate personal protective equipment (PPE) during cleaning and disinfection, including gloves, goggles, and an N95 respirator. Dispose of contaminated cleaning materials in sealed plastic bags to prevent spore dispersal. Finally, conduct a post-remediation inspection to ensure all visible mold has been eliminated and the area is properly dried.
Proper Disposal Methods
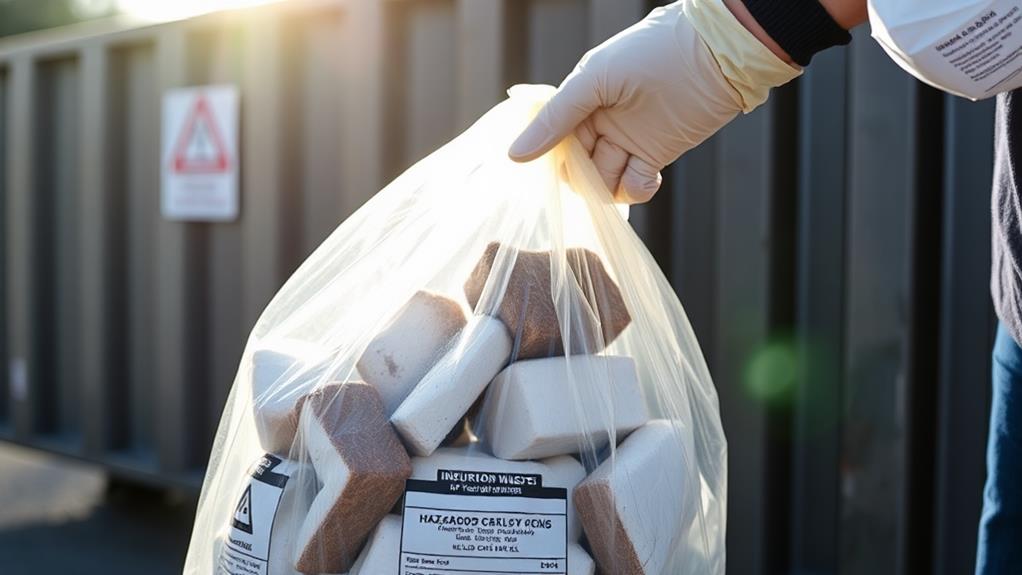
The safe disposal of mold-contaminated materials is a critical step in the remediation process. Proper disposal methods ensure that mold spores do not spread to unaffected areas or pose health risks to individuals handling the waste. All contaminated materials should be sealed in heavy-duty plastic bags before removal from the affected area. Double-bagging is recommended for added protection.
For small-scale mold remediation projects, contaminated materials can typically be disposed of with regular household waste. However, larger quantities may require special handling. Check with local waste management authorities for specific guidelines on disposing of mold-contaminated materials in your area. Some jurisdictions may require these materials to be taken to designated facilities or landfills.
When transporting mold-contaminated waste, ensure that the bags are securely closed and placed in a covered vehicle to prevent spore dispersal. If using a dumpster, cover the container to minimize the risk of spores becoming airborne. Always wear appropriate personal protective equipment, including gloves, goggles, and respirators, when handling mold-contaminated materials. After disposal, thoroughly clean and disinfect any tools or equipment used in the process to prevent cross-contamination.
Preventing Future Mold Growth
To effectively prevent future mold growth, addressing the underlying moisture issues is paramount. Identify and repair all water leaks, including those in plumbing, roofing, and foundation. Ensure proper ventilation in high-humidity areas like bathrooms, kitchens, and laundry rooms by installing exhaust fans or opening windows regularly. Maintain indoor humidity levels between 30-50% using dehumidifiers if necessary.
Implement regular cleaning routines, focusing on areas prone to moisture accumulation. Use mold-resistant products when renovating or building, such as mold-resistant drywall, paint, and insulation. Improve air circulation by keeping furniture away from walls and using fans. Promptly dry any wet areas within 24-48 hours to prevent mold spores from settling and growing.
Regularly inspect your property for signs of water damage or mold growth, paying special attention to basements, attics, and crawl spaces. Consider applying mold inhibitors to surfaces in high-risk areas. Properly maintain your HVAC system, including regular filter changes and professional cleaning of air ducts. By implementing these preventive measures, you can significantly reduce the likelihood of future mold infestations and maintain a healthier living environment.
Frequently Asked Questions
How Long Does It Take for Mold to Grow After Water Damage?
Mold growth can begin within 24-48 hours after water damage occurs, given the right conditions. Factors such as temperature, humidity, and available nutrients influence the speed of growth. Visible mold may appear within 1-2 weeks.
Can I Paint Over Mold Instead of Removing It?
Painting over mold is like putting a Band-Aid on a broken bone. It's not recommended as it doesn't address the underlying issue. Mold can continue to grow beneath the paint, potentially causing health problems and structural damage.
Are There Any Natural, Non-Toxic Methods for Removing Mold?
Several natural, non-toxic methods for removing mold include using white vinegar, baking soda, tea tree oil, or hydrogen peroxide. These solutions can be applied directly or mixed with water to create effective mold-fighting sprays for various surfaces.
How Much Does Professional Mold Remediation Typically Cost?
Professional mold remediation costs typically range from $500 to $6,000, depending on the extent of the problem and affected area size. Factors influencing price include the type of mold, location, and necessary restoration work.
Can Mold Return After It Has Been Properly Removed and Cleaned?
Shockingly, 70% of homes have mold problems. Yes, mold can return after proper removal and cleaning. Factors like moisture, humidity, and poor ventilation can lead to new growth if not addressed consistently. Regular inspections and maintenance are crucial.
Conclusion
As the final spores are swept away, a fresh, clean environment emerges from the shadows of mold contamination. Proper removal and disposal techniques serve as a powerful shield against future infestations, creating a healthier living space. The battle against mold is won through vigilance, knowledge, and swift action. By following these steps, homes and buildings can breathe freely once more, free from the silent threat that once lurked in damp corners and hidden recesses.